 Quick and dirty tutorial to create a classic Bristle Brush for Affinity Designer
1. CREATE YOUR NIB PROFILE
First of all we need a brush tip (or nib, or nozzle…), and we can do it within Affinity Designer. Create a 1024x1024px image with transparent background and three layers which will contain respectively:
- background (a simple white square)
- nibBase (the shape of our brush)
- scratchArea (to test and tune up our new media)
Using the Circle shape create a random distribution of black circles using the Cmd+Shift key dragging to create these from center. To obtain a natural look is important to keep the largest ones close to the center of the picture, and the smallest peripherally. These circles represent our “packs” of bristles so “groups” of single fibers. Obviously it is an approximation: a bristle based tool acts differently and involves physics, but the results are really good, in particular for speed performance. 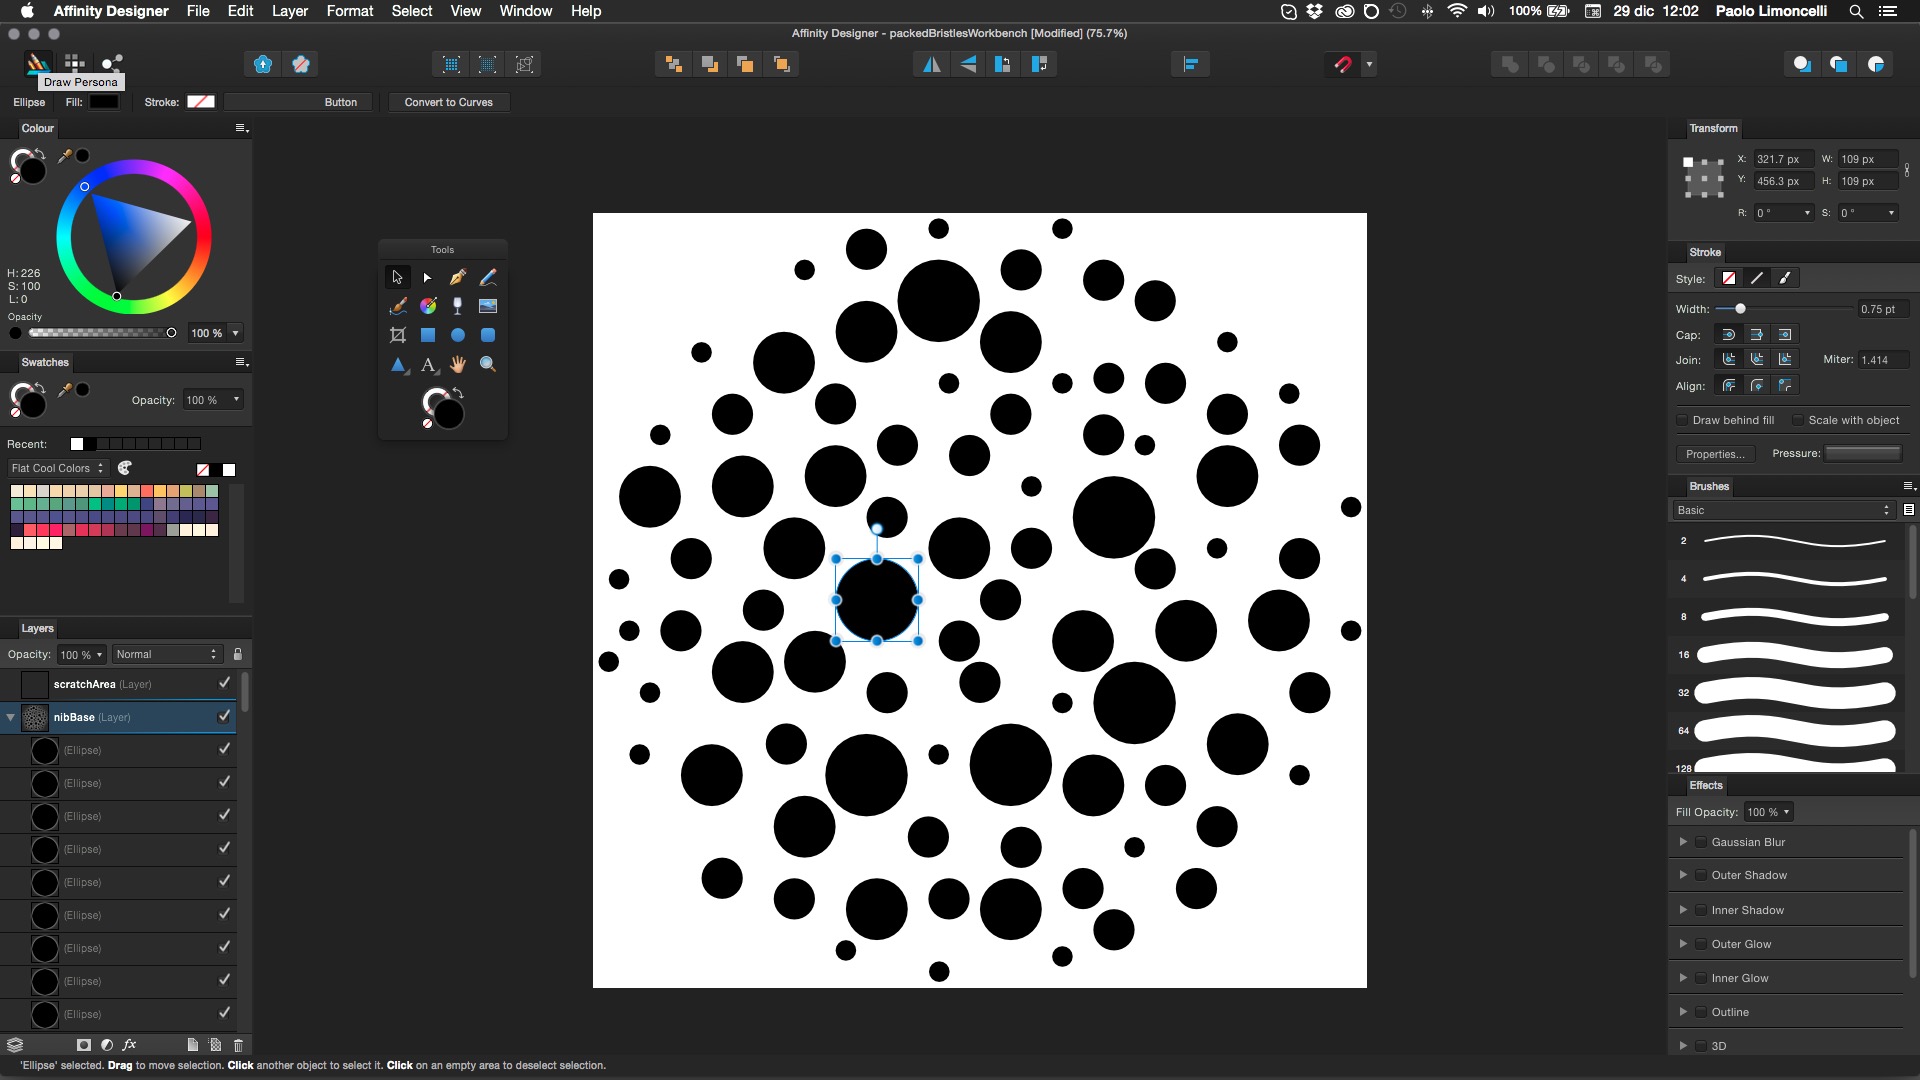 This technique was used for the first time by Mark Zimmer the creator of Fractal Design Painter which still embeds his procedural model. It produces profiles similar to the baked one we are creating. Export this picture as PNG and save it somewhere…
2. CREATE A NEW BRUSH
Switch to Pixel Persona and create a new Intensity Brush in Brushes Studio, if it is not open can lift it up from the View menu 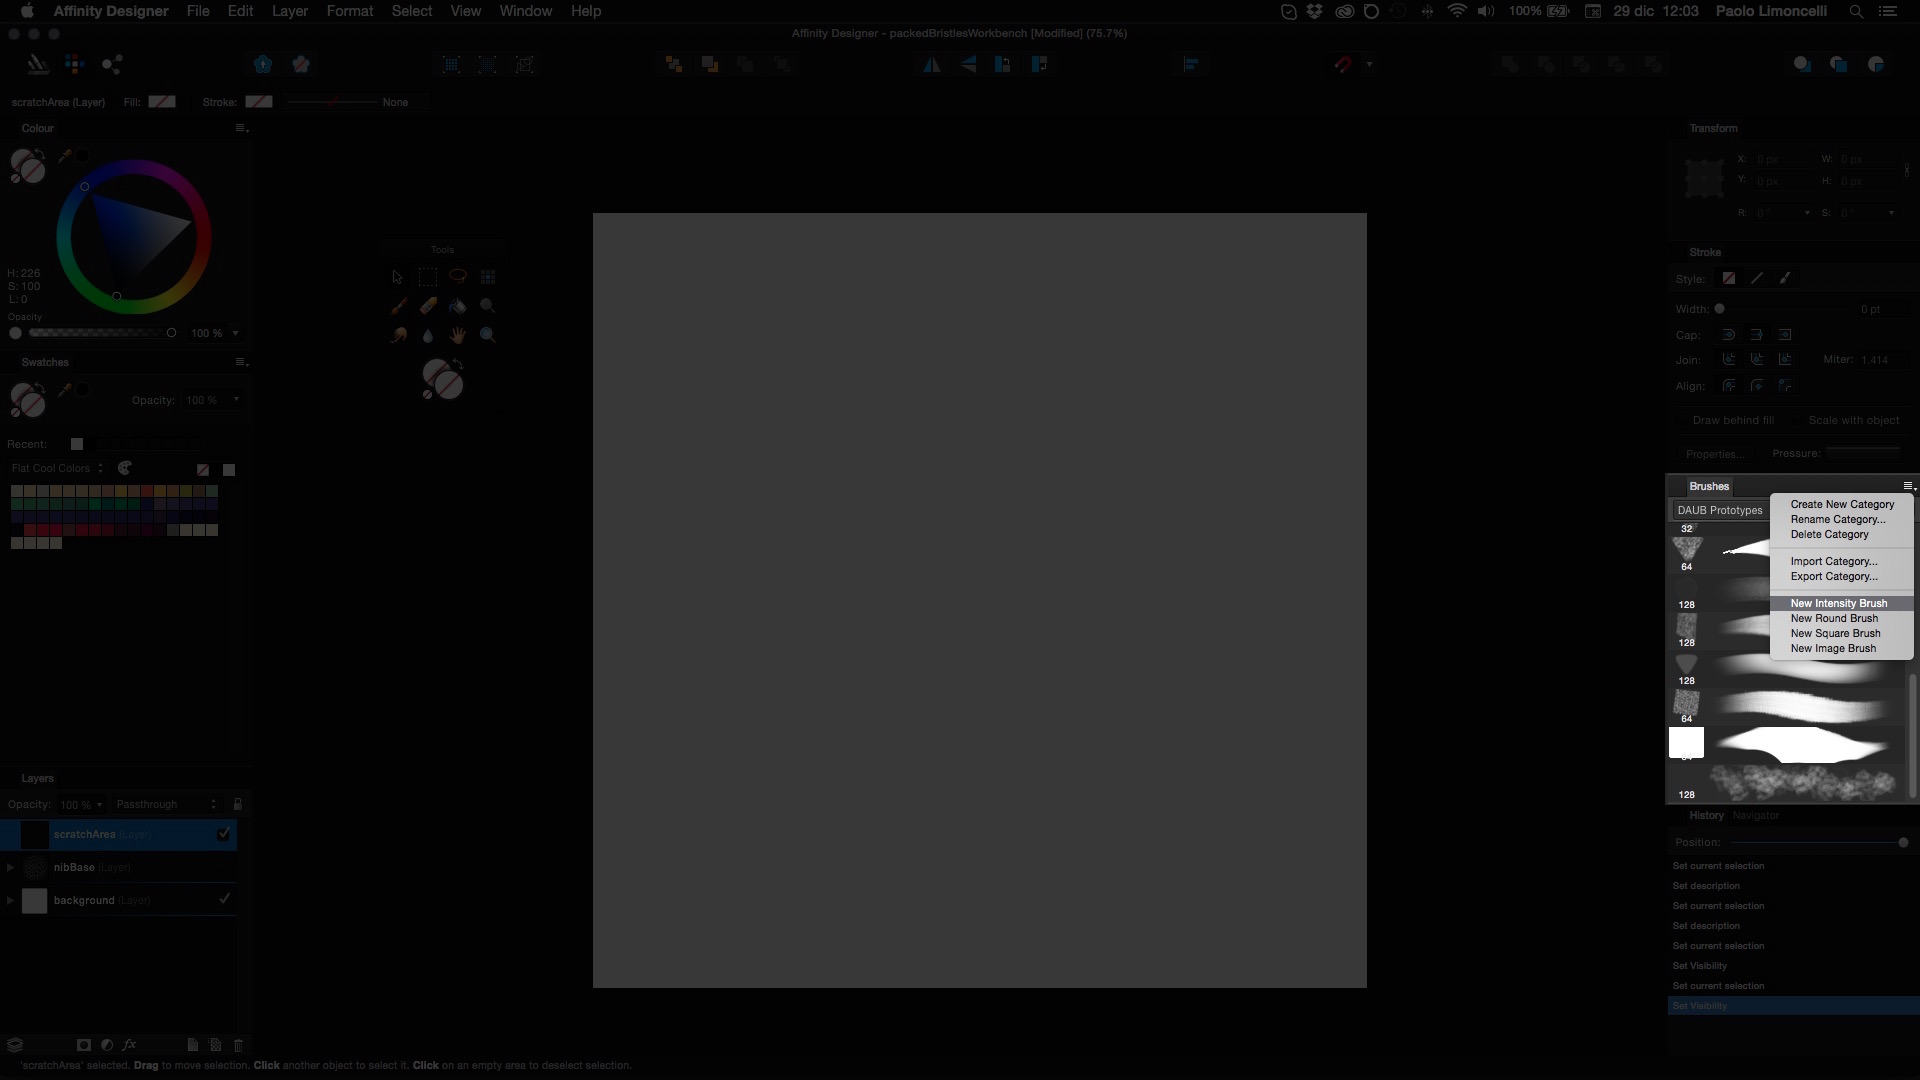
3. TUNING IT UP
Now we have to choose the saved PNG and the preset will appear at the end of the list in the Brushes Studio Palette.  Toggle nibBase visibility and switch to scratch layer then double click the preset to open the Brush Editing panel. From the General tab change Spacing value to 4% (a good compromise for speed/quality) and Flow to 25% (to point out bristles trails)
 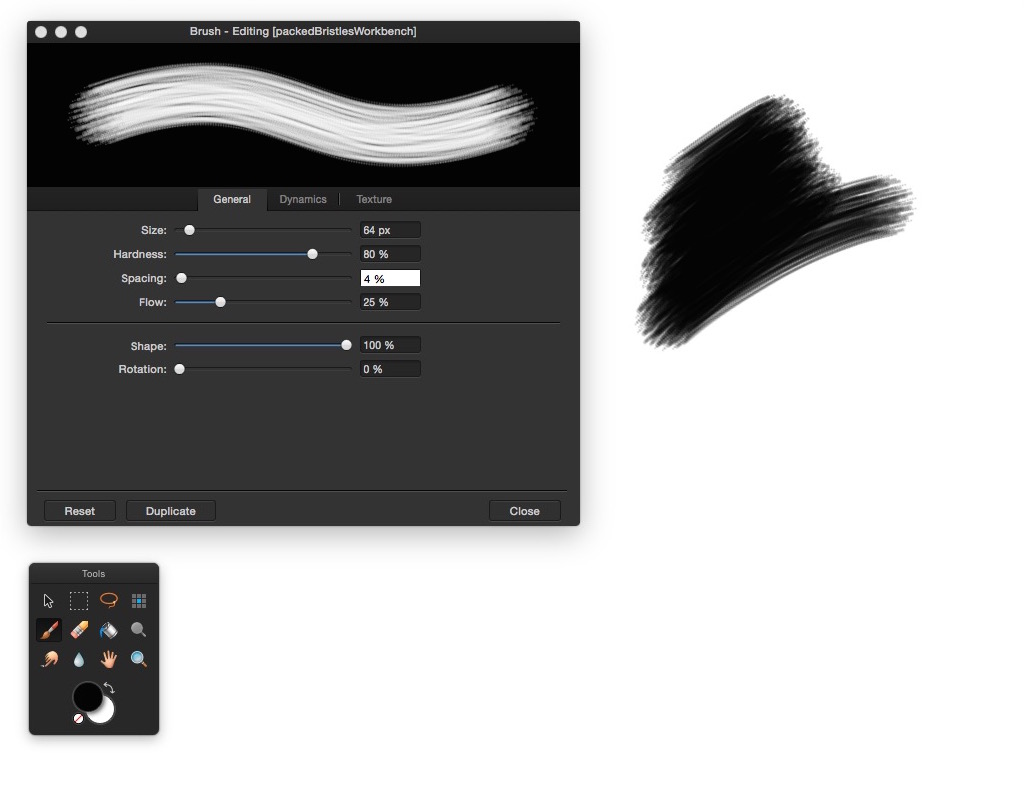 Now is time to use a bit of Dynamics to give this brush some “life”. From the realtive tab move the Flow Jitter to 100% link it to Pressure and choose the Quadratic curve (the second one) so the response of our pen will not be linear, resulting more natural.
 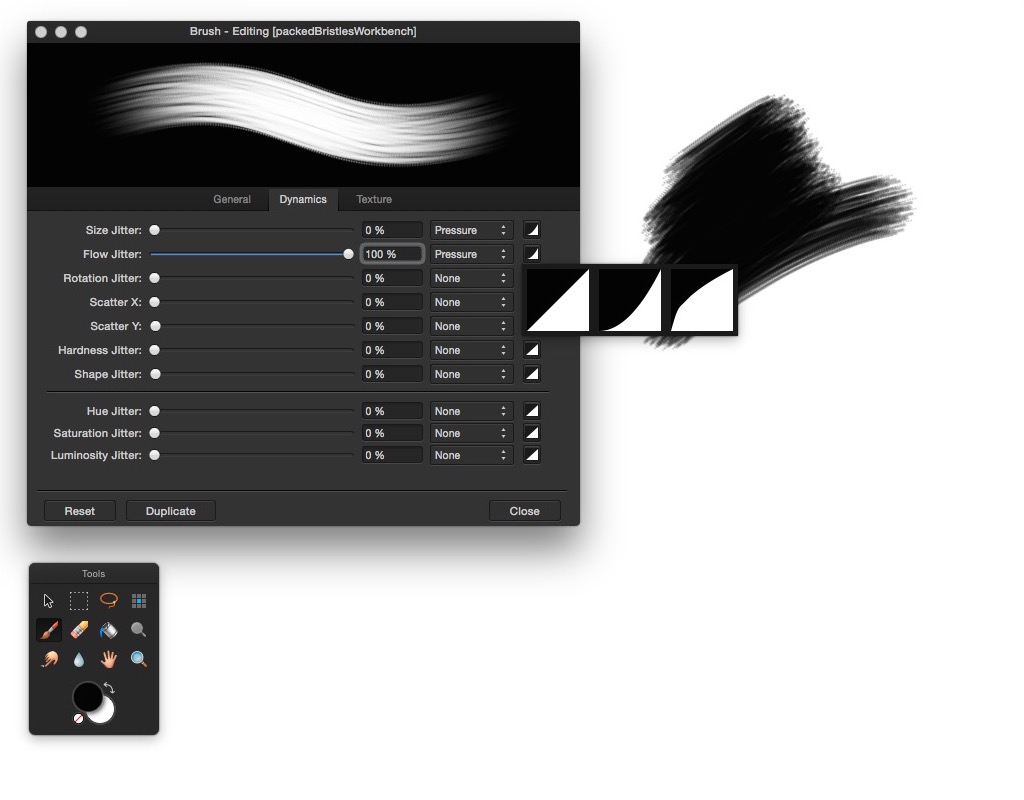 Move the Rotation Jitter to 100% and link it to Rotation (this step will work only for Wacom ArtPen but the results are more organic) and Size Jitter to 24% using the quadratic curve here too.
 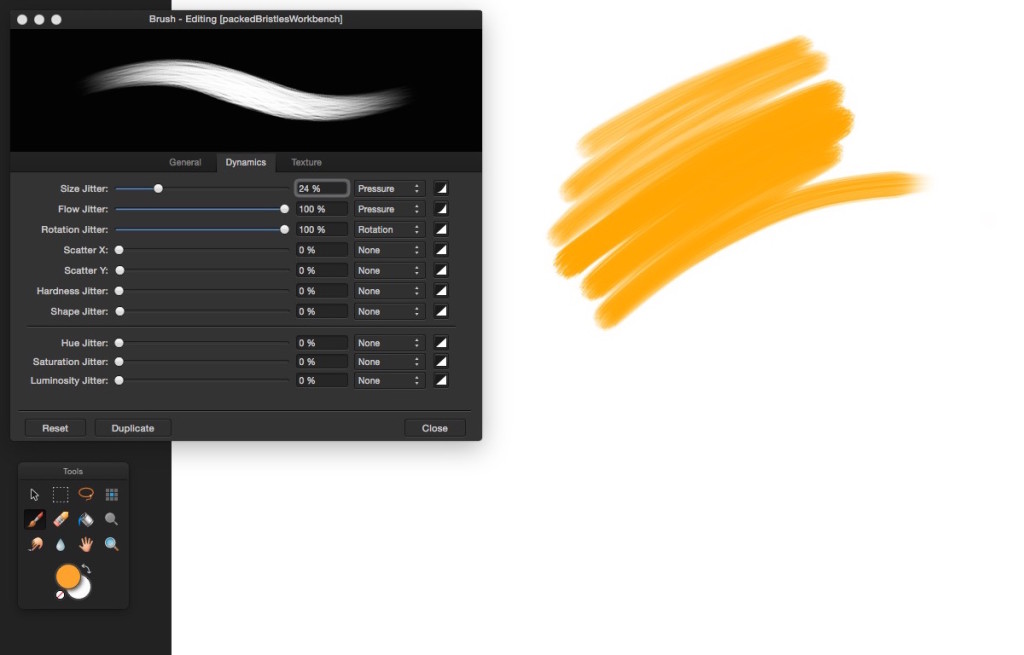 Now the brush is natural and smooth, and the pigment deposition increases with pressure hiding the trails.
4. COLOR MIXING EMULATION
AD doesn’t support a color bleeding/mixing feature (we’ll find it in AffinityPhoto), but we can emulate it using a combination of blending mode and colour dynamics, to do it we need the Saturation and Luminosity Jitters. 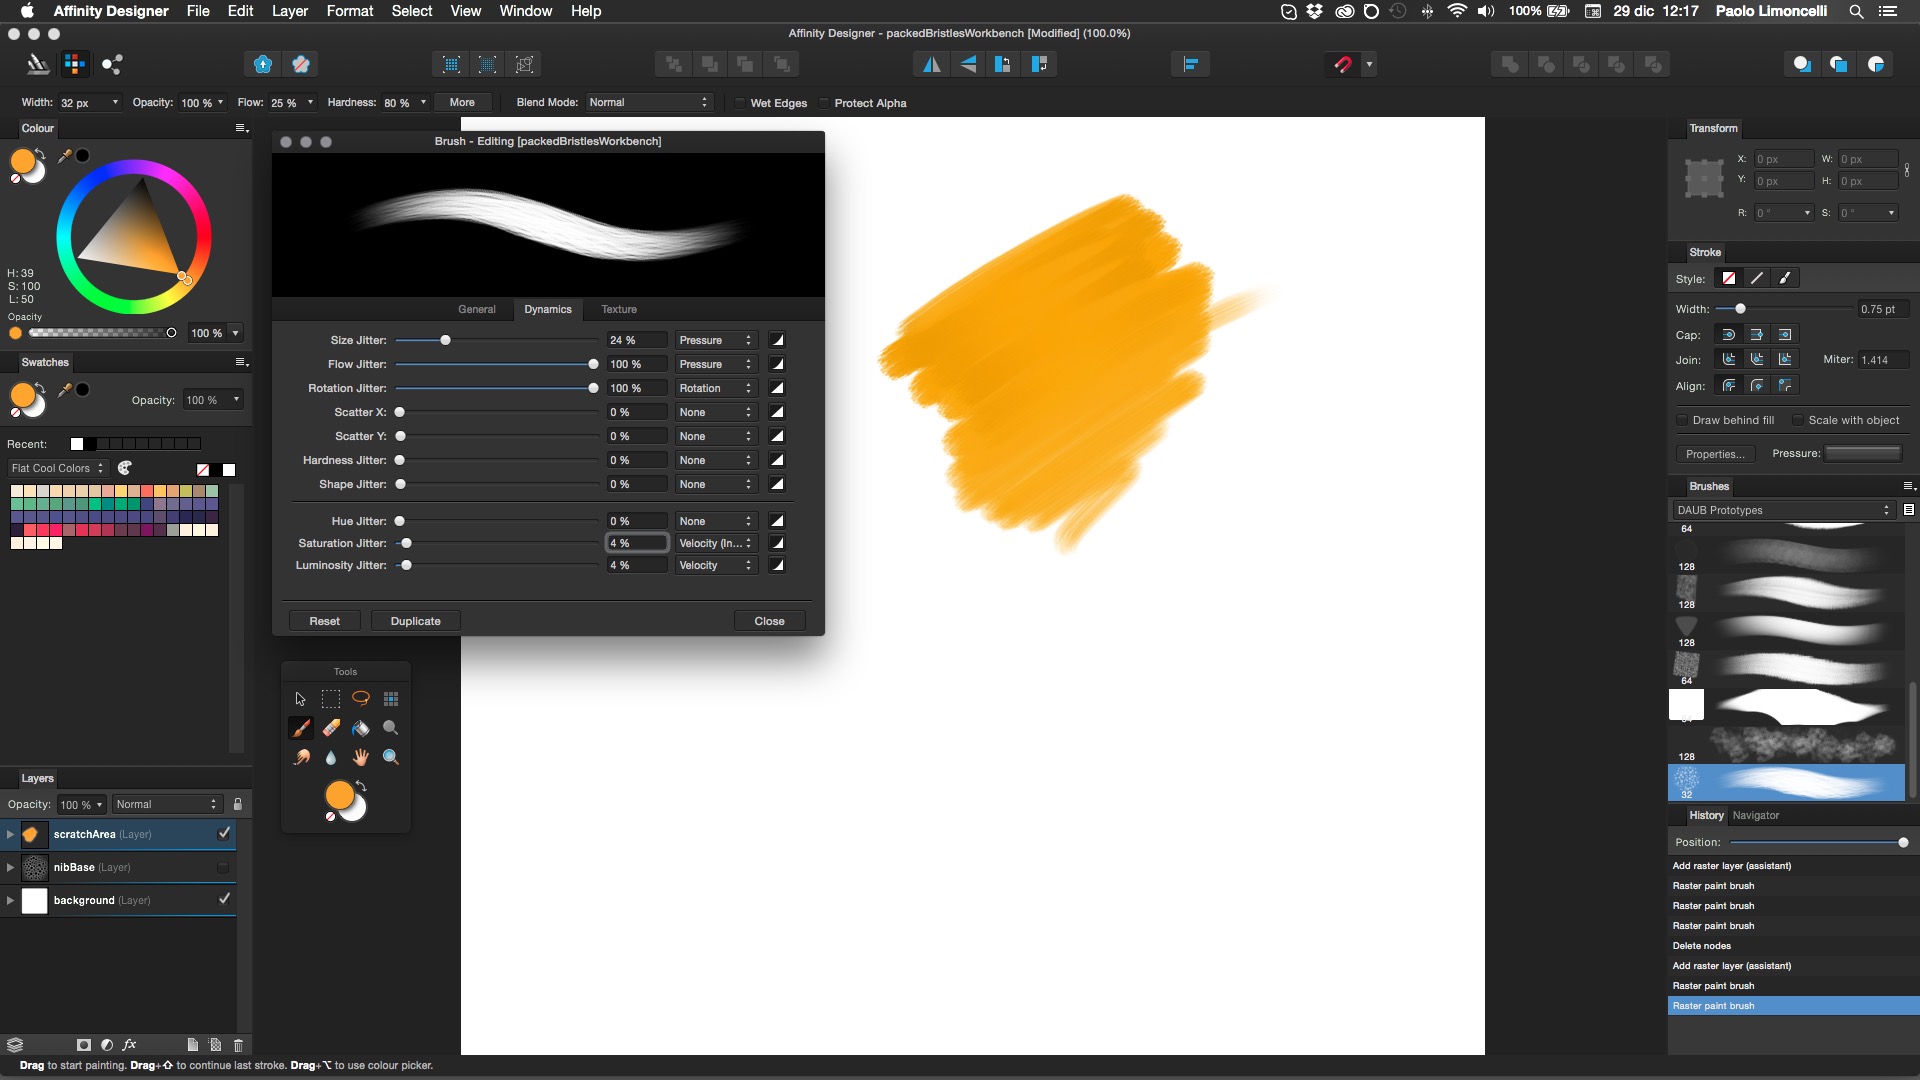 Move both to 4% and set the Saturation to Velocity (inverse) with quadratic curve and Luminosity to Velocity and quadratic too. The resulting stroke will deliver a sort of dirty pigment, and the slower you paint the darkest. Filling large areas with these settings will give the sensation of material. To blend colours set the Blend mode to Average
 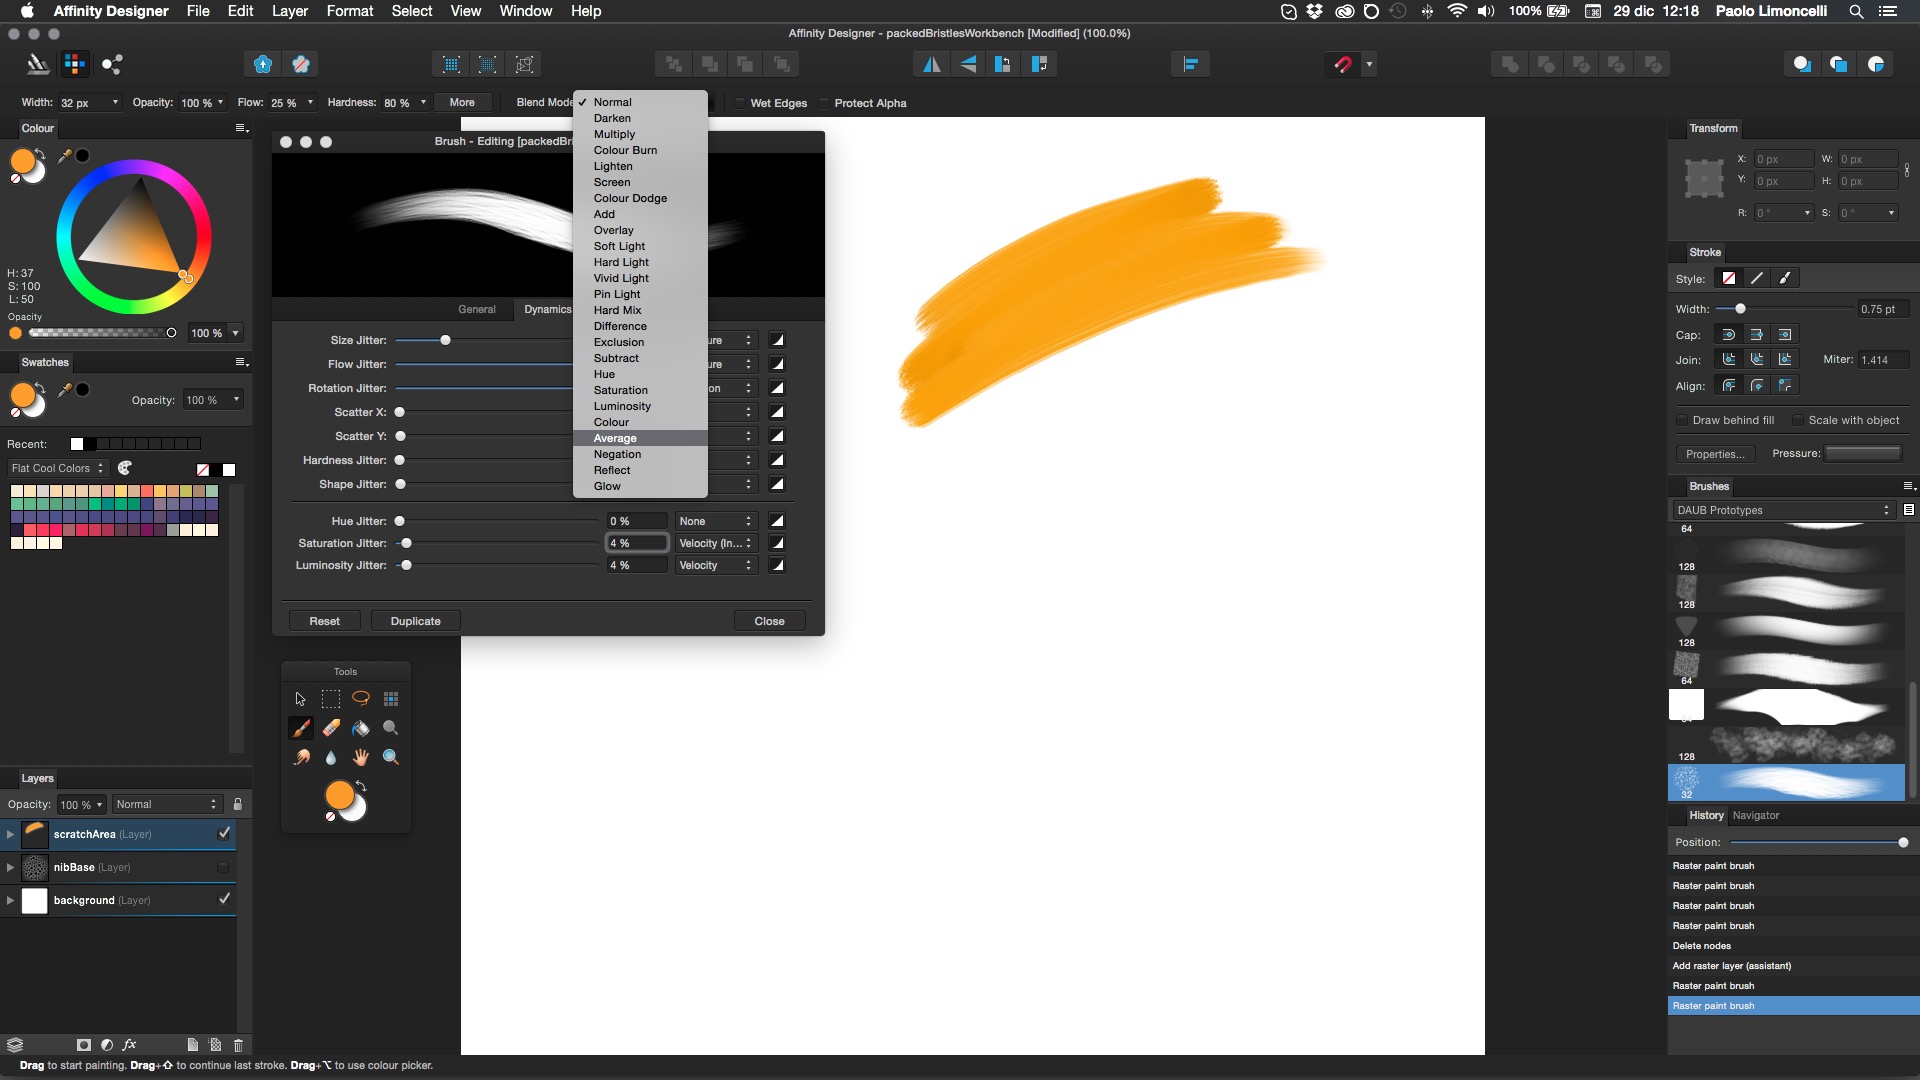 Now overlapping strokes will produce an intermediate color between the two and…
 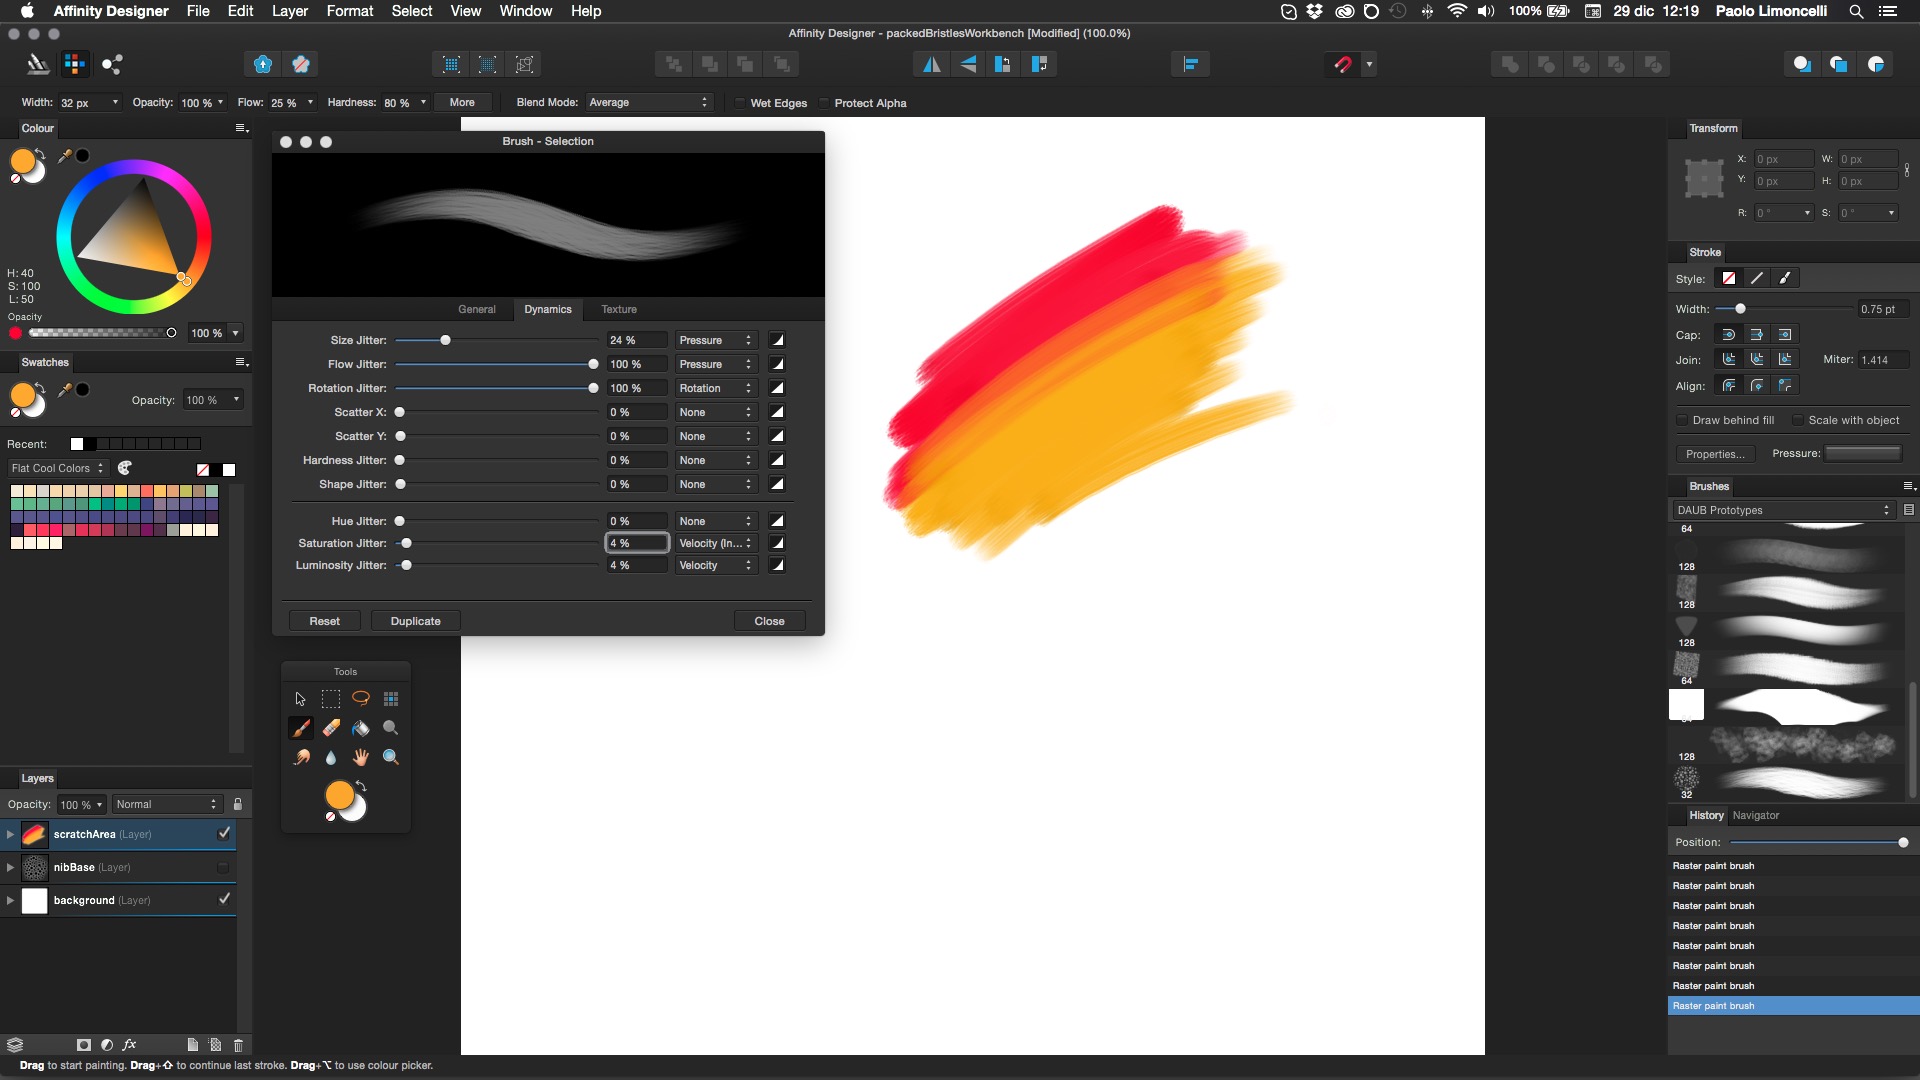 … We’re done! To have a more grainy look, use this preset with the Pixel Brush tool which will turn antialias (the edge smoothing) off.
Playing with Texture and Wet Edges is easy to achieve a great gouache effect.

Happy painting!